Showing posts with label Airfix. Show all posts

Thursday, 16 October 2014

1/48 Land Rover Snatch & WMIK

A little different from my normal aircraft models are these two little land Rover kits from Airfix.  They both come in the same box and the models represent the newest types of land rover used by the British armed forces in Afghanistan.  From the outset I had a clear brief for these two models, they had to be well used and well worn, with crew figures and plenty of stowed equipment. I also opted to use the Airfix photo etch set for the Land Rovers, which greatly improves the detail of some areas of the kits.  For the stowage I could not find much aftermarket but after some considerable searching I found a company call Red Zebra which is just starting up and can only be purchased direct.  I will post a review of the items I purchased at a later date, but suffice to say I am very impressed. For the crew I used the Airfix vehicle crew set which was clearly not meant to be used with the Land Rovers.  All the figures are too large and needed some serious re working to fit.  I added Barracuda netting to the Snatch Land Rover by punching out semicircles into paper. Both models were painted in Airfix acrylic paints and weathered with oil washes.

So here they are...

Wednesday, 8 October 2014

1/72 Airfix Vulcan Build Log Part 1

Recently I have just been posting completed builds and thought it was time for a more in depth build log. So here it is...


...the Airfix 1/72 Vulcan B Mk2 XH558.

The model is going to be built as XH558 as she displayed in this years airshow season, finished with the landing gear down, the bomb bay doors shut, with a gloss finish and is going to be re-scribed.  From the box an accurate representation of XH558 cannot be made.  This is due to two main inaccuracies

  1. The TFR (terrain following radar) on the nose was removed from XH558 when she was converted to an SR2 (maritime radar reconnaissance). 
  2. The kit is modeled with the larger diameter exhausts of a Vulcan fitted with Olympus 301 series engines when XH558 is fitted with Olympus 201 series engines which are smaller and therefore have a smaller diameter exhaust.
The first issue is not that big of a deal chop, fill, sand and it should be sorted (famous last words).  The second issue is a bit harder to fix and I'm sure it could be done with some brass tube of the correct diameter and some more filling and sanding, but why bother when I can get these...


... Freightdogs 1/72 Vulcan B.2 Olympus 201 tailpipes.

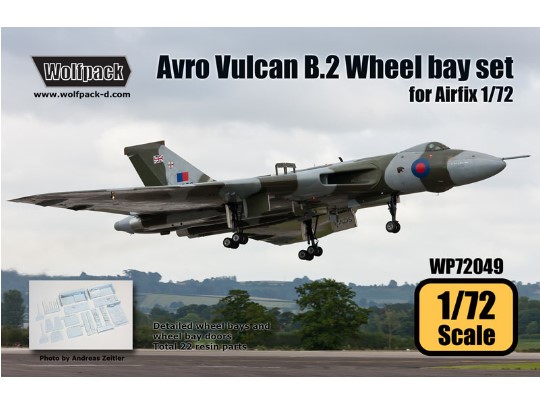
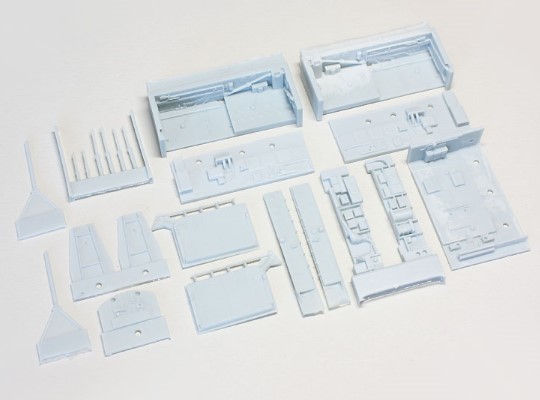
As well as the Freightdog tialpipes I will also be using Wolfpack's wheel bay set...


I am also toying with the idea of using this...


... the Air Master 1/72 Refueling probe - NATO Standard (AM-72-018),  to improve the kit part, or completely scratch build a new one.

So that is the plan, next log will be after the arrival of the goodies and hopefully the re-scribing will be complete

Sunday, 5 October 2014

1/48 Spitfire PR XIX

For my next model I wanted a quick and simple build that would not be too taxing.  I recently purchased some Airfix models and one of those kits was the 1/48 Spitfire PR XIX.  With its attractive box art the kit had been calling me to build it since it arrived but, I had promised I would not start any more models until I had finished some that are sitting on the shelf of doom.  I could resist no longer I finished my Airfix 1/48 Spitfire PR XIX in record time, just a mere three days from start to finish! This was due in part to my interest in this aircraft and the kit being excellent.  For a full in box review click on this link: Airfix 1/48 Spitfire PR XIX review. 

The kit was a dream to build with only a smear of filler needed were the rear of the wing meets the fuselage, which is common on most single engine piston fighters. The only addition I made to the kit was a set of photo etch seat belts form Eduard and some decals for the instruments and placards  in the cockpit form the spares box.  I decided to cut out the access panel as per the instructions so that the camera bay was visible. I wanted the aircraft to be clean so I gave the model a slight post shade and very little weathering. 


I also tired out Humbrol acrylics and was pleasantly surprised with how well they airbrushed, so I will now be getting some more!


Related Posts Plugin for WordPress, Blogger...